Set a default location and row details
Two settings shape every new scan session: where it starts, and what you see on each scanned product.
Default location
- In the app, open Settings.
- Under Location, pick a Default location.
New scan sessions open at that location; you can still change it in a session before you commit. With No default — use the first location, new sessions use your store’s first location. Sessions you already saved keep their location.
What each scanned row shows
Under Display Settings, tick the details to show on each row in Scanned Products: Product Title, SKU, Variant Title, Product Image, Price, Barcode and Vendor. Product Title, SKU and Variant Title are on to start with. Changes save as you tick; click Done to go back.
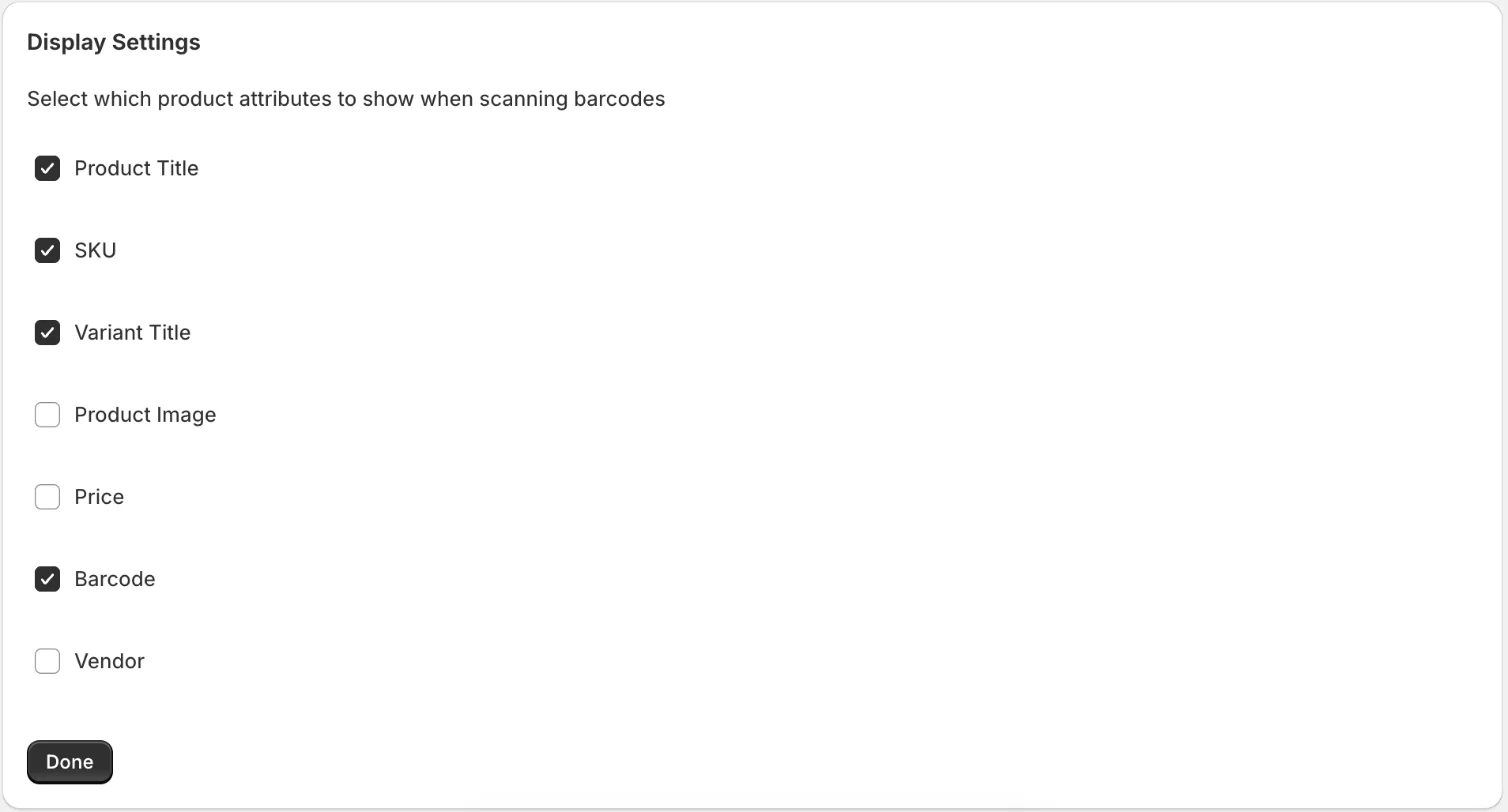
You can also open these settings from a scan session with the Settings link above the scan field.
Related
Related articles
- Update stock by scanning barcodesStart a scan session, add products with a scanner, the camera or the product picker, and commit the new quantities to one Shopify location.
- Scan history and CSV exportFind past scan sessions, reopen one, and download the scanned items for a date range or for a single session as a CSV file.
- Share a scan with warehouse workersLet staff count on their own phone or tablet with a link and QR code, no Shopify login, then review their counts and apply them to your scan list.