Update stock by scanning barcodes
A scan session collects products and quantities, then changes stock at one location in a single step. Nothing changes in Shopify until you click Commit Inventory Update.
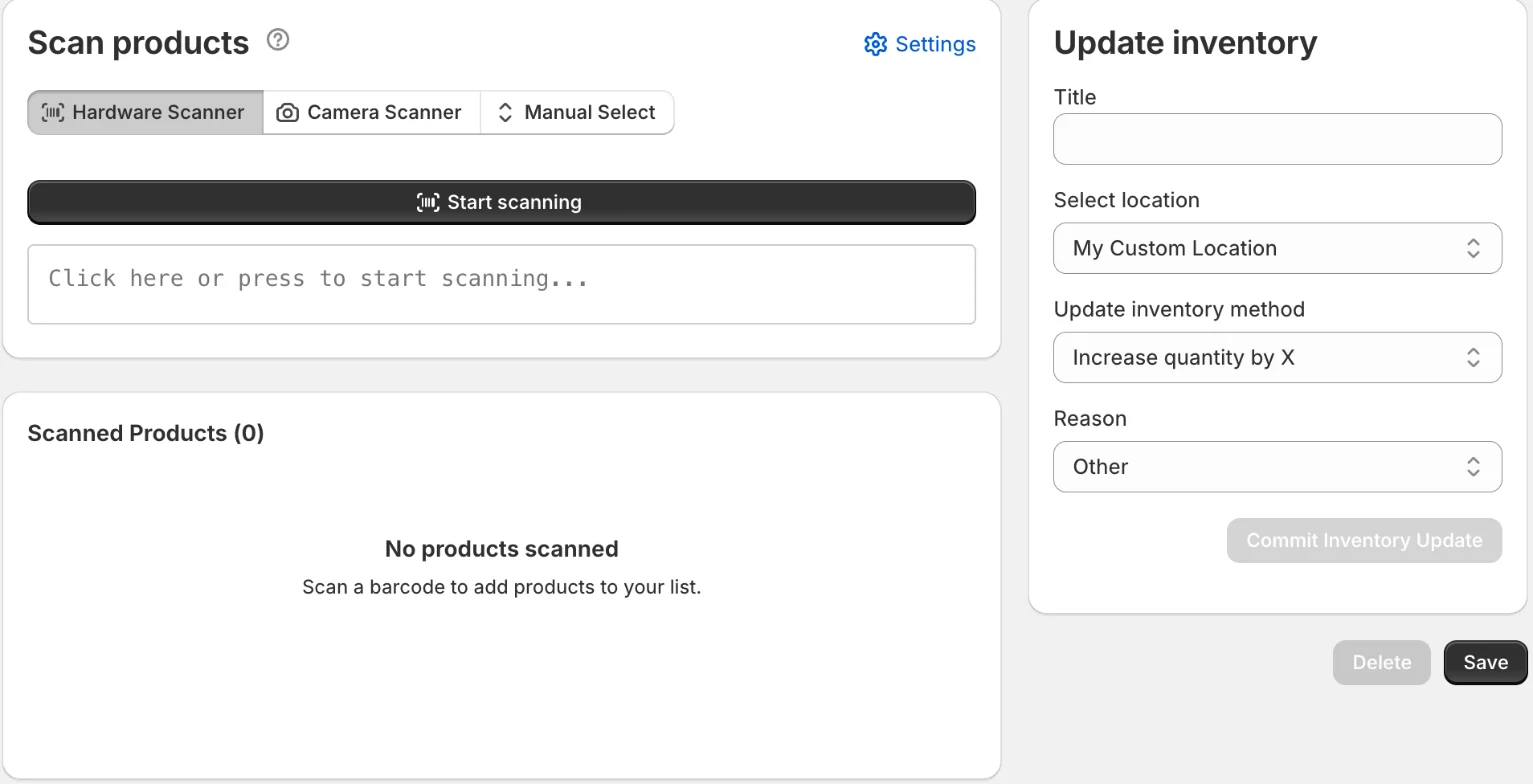
Start a scan session
- In the app, click New scan.
- Under Update inventory, give the session a Title if you like.
- Pick the location in Select location. New sessions start at your default location (see Scan settings).
- Choose the Update inventory method:
- Increase quantity by X adds the scanned quantity to current stock, for example when goods arrive.
- Decrease quantity by X subtracts it, for example for damaged items.
- Set quantity to X replaces current stock with the scanned quantity, for example after a count.
- Pick a Reason: Correction, Cycle Count Available, Damaged, Promotion, Quality Control, Received, Restock, Safety Stock, Shrinkage or Other.
Add products
Choose a mode under Scan products:
- Hardware Scanner: click Start scanning, then scan with any USB or Bluetooth scanner that types into a field. You can also type a barcode and press Enter.
- Camera Scanner: click Scan with Camera and allow camera access. This works best in the Shopify mobile app.
- Manual Select: click Select Products and pick products and variants from your catalog. Each is added with quantity 1.
Each scan adds the product to Scanned Products, or raises its quantity if it’s already there. Change a quantity on its row, or remove the row with ✕. To choose what each row shows (image, price, vendor and so on), click Settings.
Click Save to keep the session and come back later. On Professional, progress is also saved automatically.
Commit the update
- Check the location, method and quantities.
- Click Commit Inventory Update, then confirm. The dialog warns that your inventory will be updated in Shopify and it can’t be undone.
A session moves through these statuses: NEW, PENDING, RUNNING, COMPLETED and FAILED. A session commits once; committing it again is refused. If Shopify rejects the update, the session shows The last run did not finish with Shopify’s reason, so you can fix it and commit again.
Related
Related articles
- Set a default location and row detailsChoose the location new scan sessions open at, and which product details appear on each scanned row.
- Share a scan with warehouse workersLet staff count on their own phone or tablet with a link and QR code, no Shopify login, then review their counts and apply them to your scan list.
- Scan history and CSV exportFind past scan sessions, reopen one, and download the scanned items for a date range or for a single session as a CSV file.