Add a sales rep and give them access
Sales reps don’t need a Shopify staff account. You create them in FieldB2B, and they sign in to their own portal.
Create the rep
- In the app, open Sales Reps and click Add Rep.
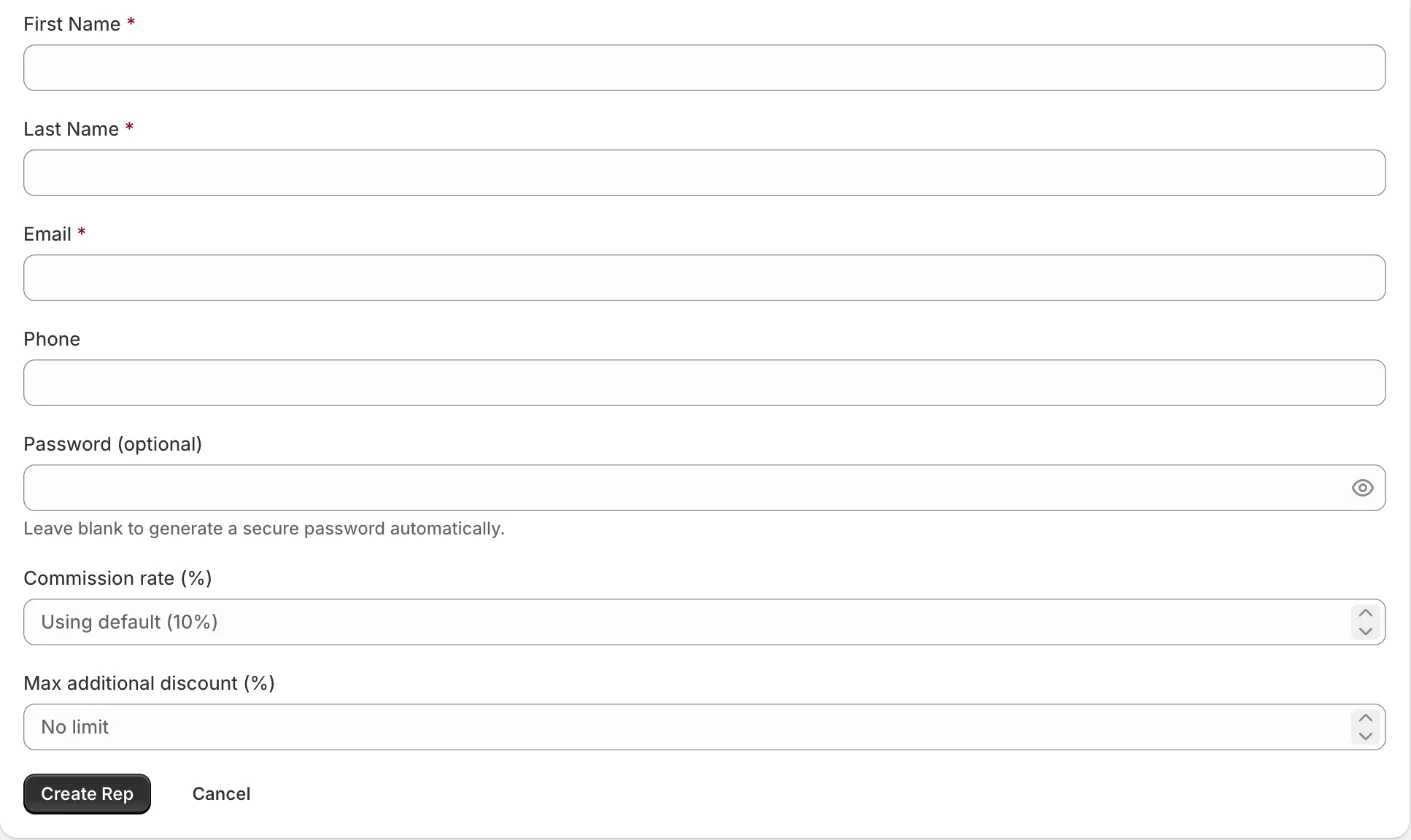
- Fill in First Name, Last Name and Email. These are required. Phone is optional.
- Optional settings:
- Commission rate (%): leave it blank to use your store’s default rate from Settings.
- Max additional discount (%): the most this rep can take off on a quote. Leave it blank for no limit, or enter 0 to stop the rep from giving discounts at all.
- Password (optional): leave it blank and the app generates a secure password.
- Click Create Rep.
Share the login
After you create the rep, the app shows Login Credentials: their email and password.
- If the app generated the password, it is shown only once. Click Copy Credentials and send them to the rep before you leave the page.
- If you typed the password yourself, the page says so instead of showing it.
You can also let the rep sign in by QR code, without a password. See How reps log in.
If the rep loses the password
Reps can’t reset their own password. The Forgot your password? link on the portal sign-in page does not send an email.
Instead, open the rep in Sales Reps and click Reset Password. The app generates a new password and shows it once; the old one stops working. To choose the new password yourself, click Set Password instead.

If you’ve reached your plan’s limit
When you have as many reps as your plan allows, the Sales Reps page shows a “plan limit reached” warning and you can’t create another rep. See Plans and limits compared.
Next step
A new rep sees “No companies assigned” until you give them companies. Assign reps to companies.
Related articles
- How reps log in (password, QR badge, store link)The three ways a sales rep can sign in to the FieldB2B portal, and how to cancel a lost QR badge.
- Assign reps to companiesGive each sales rep the companies they look after, so those accounts appear in the rep's portal.
- Install FieldB2B and choose a planInstall Mify FieldB2B from the Shopify App Store and choose a plan, which you need to do before you can use the app.